The Lightsail I use is different from other places in that PHP upgrades cannot be done simply by setting them up, but must be done through instance transfer, which is complicated, so I’ve been putting it off, but I’ve decided to take my time and do it this time.
However, since I had not organized the process of upgrading PHP through instance transfer during that time, I had to search for it again each time. So, I will organize it in order this time so that I can refer to it the next time I upgrade PHP.
The part I’m organizing below is based on my standards, so it may differ from all instance transfer methods. So, rather than following this article as is, I hope that those who read it will compare it with their own settings and use it as a reference.
Before migrating an instance, take a snapshot of the existing instance so that you can restore it if a problem occurs.
Since it has been a long time since we have migrated an instance, many errors occurred and I will explain those errors below.
Table of Contents
Instance Transfer – Backup
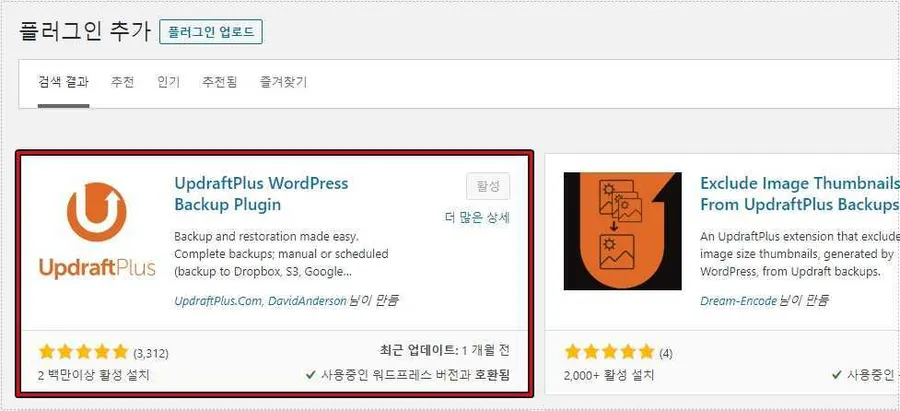
In order to transfer an instance, you must first back up the existing WordPress. There are various plugins available, but I used UpdraftPlus to back up the instance.
This plugin requires a paid subscription if the capacity is large, but if you use Google Drive space, you can back up for free. After installing the plugin, you can see the settings in the top menu, go in, select Google Drive, and authenticate to use it as storage space.
Since backups are not saved 100% error-free, you need to find the failed parts and upload them yourself. In my case, I uploaded the file myself because some of the images had errors.
I have written a post on how to use the plugin, so please refer to that post. – Updraftplus plugin that can backup WordPress
Create an instance
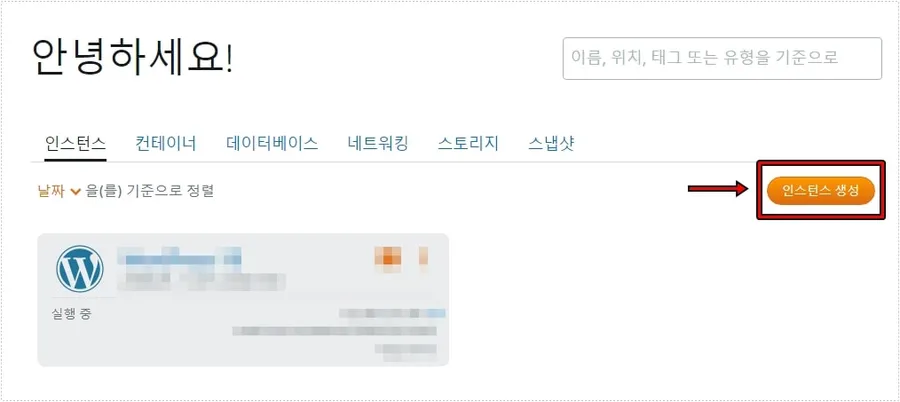
If you have backed up your existing WordPress, you can go to Lightsail and create an instance. It will take about 5 minutes for it to run after creation, so please wait for some time and then proceed.
Find and restore your password
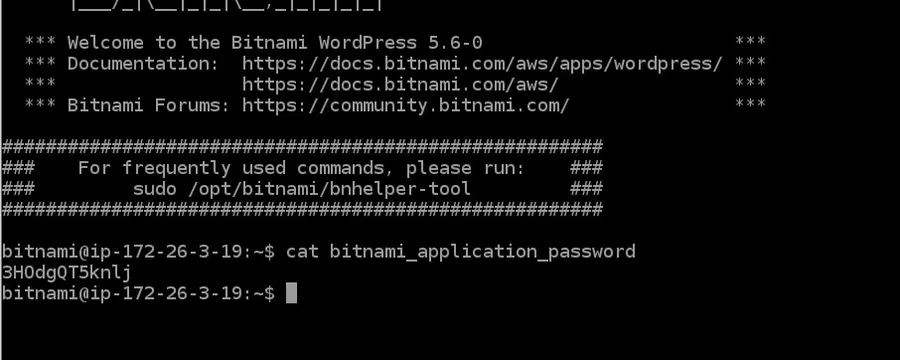
Once the new instance is up and running, you can find out the password by connecting to SSH and then entering cat bitnami_application_password. You can copy the password by dragging and right-clicking to copy.
If you found out the password, copy the new instance IP address, then access XXX.XXX.XXX.XXX/login in your browser, enter user as the username, and enter the password you found out above to log in.
If you have logged into your WordPress administrator, install the UpdraftPlus plugin, set up Google Drive, and then click Rescan at the bottom, you will see a list of your backups.
You can restore the backed up data to a new instance by clicking the Restore button there.
Remove Bitnami banner
Let’s remove the Bitnami banner that appears on the new instance WordPress screen while restoring the backup. After connecting to the new instance SSH
If you enter sudo /opt/bitnami/apps/wordpress/bnconfig –disable_banner 1, the Bitnami banner will be removed.
If you set something in SSH, you will need to reboot, so type sudo /opt/bitnami/ctlscript.sh restart apache .
Activate advanced caching plugin (WP_CACHE)
If you are using a cache plugin, you will need to enable the advanced caching plugin, but the WP Fastest Cache cache plugin that I use does not require any activation according to the developer’s response.
For other cache plugins, you will need to enable the advanced caching plugin, so let’s look at how to do that.
First, if the cache plugin is enabled, disable it first, then connect to the new Lightsail instance with SSH and open the file by entering sudo nano /opt/bitnami/wordpress/wp-config.php. Then, add define(‘WP_CACHE’, TRUE); right below <?php.
Setting Expires Headers
After connecting to the new instance with SSH, type sudo nano /opt/bitnami/apache2/conf/httpd.conf.

If you opened the httpd.conf file with an editor, you can remove the # in front of what is shown above.
Then if you are using a cache plugin, disable and enable it and it will automatically add the expires header.
Allow .htaccess

After connecting to the new instance with SSH, enter sudo nano /opt/bitnami/apps/phpmyadmin/conf/httpd-app.conf.
Then, change the AllowOverride section to All.
※ Once the instance transfer restoration is complete, the user and password will change to the ones previously used, so log in by entering the user name and password you previously used.
Astra Theme Font Swap
Since I am using the Astra theme, I just add the code below to the bottom of Functions.php.
add_filter( ‘astra_fonts_display_property’, ‘astra_replace_fallback_with_swap’ );
function astra_replace_fallback_with_swap( $property ) {
$property = ‘swap’;
return $property;
}
If the image is broken after restoration
If you enter the site after completing the restoration and the image is not displayed properly, it means that an error occurred during the backup and restoration, and even if you back it up again, the problem is mostly not resolved.
So in my case, after installing the Filester plugin on my existing instance, I just download images organized by year from /opt/bitnami/wordpress/wp-content/uploads.
Then, if you install the Filester plugin on the new instance and upload the downloaded image, you will be able to resolve the broken image error.
The reason I used the Filester plugin was because I tried downloading it with FileZilla, but it took too long.
Static IP connection
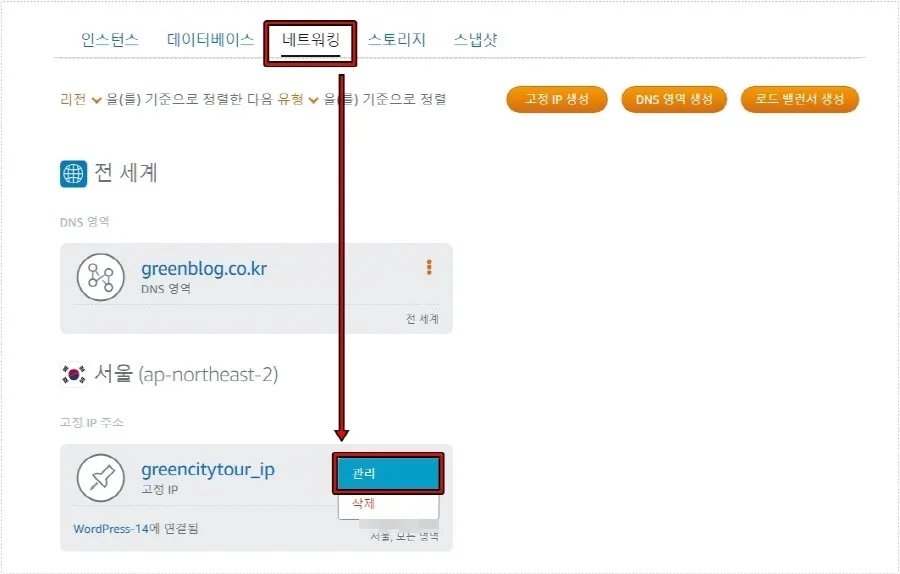
If it looks fine on the site, you now need to connect a static IP. Go to Lightsail, click on Networking, then click on the three dots under Static IP Address to go into Management.
Then, after detaching the existing instance, you can connect the fixed IP to the new instance. After about 5 minutes, you can connect to the existing domain.
Installing a Let’s Encrypt Certificate
To secure your connection, you’ll need to install a free Let’s Encrypt certificate, but there’s a quick-install stack that can help you do this quickly.
Simply enter the command below in the new instance SSH.
sudo /opt/bitnami/bncert-tool
When you run it, it will ask you to update. Press Y to proceed, then enter the command above again. Then, enter the domain and set the redirect (Y, N, Y).
When the guidance message appears, press Y, enter your email address, and then press Y in the next question to complete the entire process.
No authentication header error
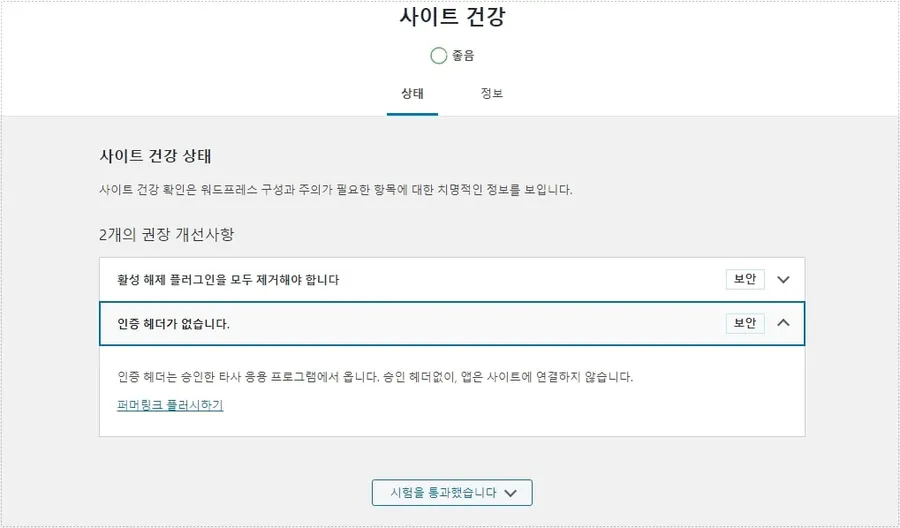
After migrating my instance, I was looking into whether there were any issues and noticed an issue with Site Health that said “No authentication header.”
Since this was a problem I had never experienced before, I searched on Google and after quite some time, I was able to find a solution and solve it.
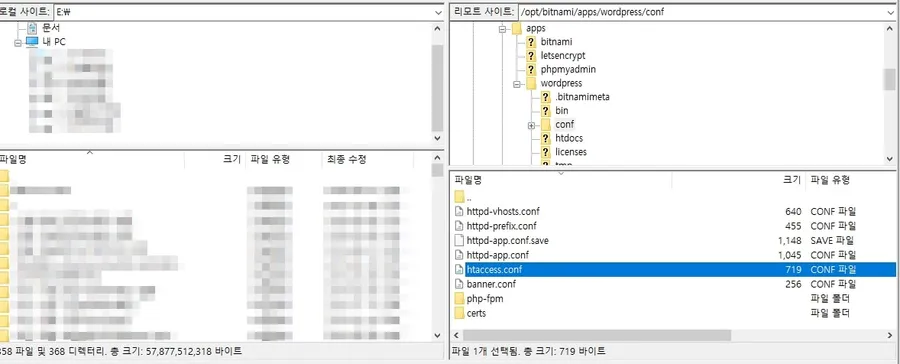
Using FileZilla, go to /opt/bitnami/apps/wordpress/conf, right-click on the htaccess.conf file, and select View/Edit.
If you don’t have FileZilla, connect to your Lightsail instance via SSH and open the file by entering sudo nano /opt/bitnami/apps/wordpress/conf/htaccess.conf.
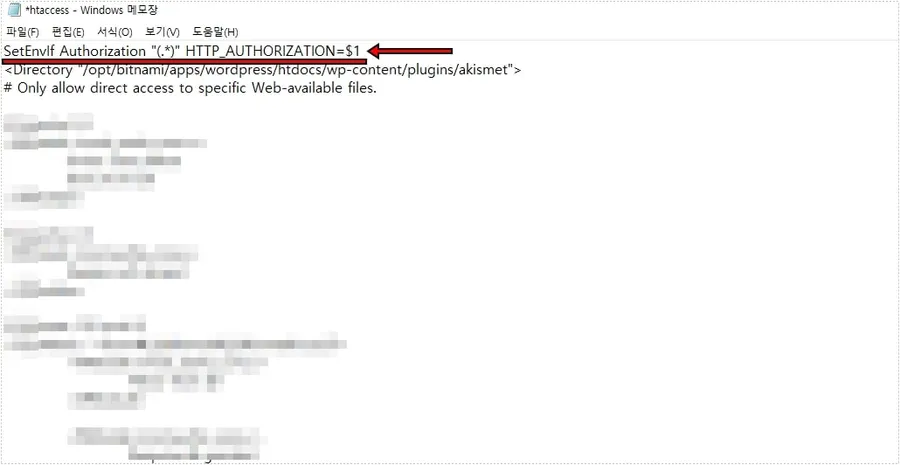
If you open the htaccess.conf file, enter SetEnvIf Authorization “(.*)” HTTP_AUTHORIZATION=$1 at the very top and then save it. Finally, reboot Apache and the error will be resolved.
IP address redirect
An issue occurred where, even if you entered an address with www attached, it would be redirected and connected to the address you were using, but if you entered an IP address, it would not be redirected.
This is something I set up when I first set up WordPress, but I couldn’t remember how to do it, so I searched and found a way. It turned out that all I had to do was add a .htaccess redirect.
<IfModule mod_rewrite.c>
RewriteEngine On
RewriteBase /
RewriteCond %{HTTP_HOST} ^12\.34\.56\.789$
RewriteRule ^(.*)$ [L,R=301]
</IfModule>
If you open the .htaccess file, you will find the Begin WordPress section. Copy and paste the code above that section, replacing the IP address with your site address.
But even after adding it, the IP address was still not redirecting. So I searched for the issue again and found out that I had to change the settings to make it work properly.

If you change the setting shown above to All in /opt/bitnami/apps/wordpress/conf/httpd-app.conf, the IP address redirect added to .htaccess will work properly.
※ addition
If you cannot find the httpd-app.conf file or if the redirection does not work even after modifying httpd.conf,
/opt/bitnami/apache2/conf/vhosts/wordpress-https-vhost.conf or /opt/bitnami/apache2/conf/vhosts/wordpress-vhost.conf
You can do this by changing the AllowOverride entry to All.
The content summarized so far is the instance transfer process that I set up, so there may be some parts that are different from your settings. Since it is a summary of the parts that I experienced, if there are any parts that occurred in error or were missed, please refer to the explanation and set them up so that you can easily transfer the instance for a PHP upgrade.
▶ How to fix apple touch icon 404 error
▶ WordPress Widgets: How to Switch to the Older (Classic) Version
▶ Google Fonts – How to Speed Things Up by Removing Them in WordPress
