When using WordPress, there are times when you need to upload large images or files. However, the default upload size is limited to 2MB, so uploading is often impossible. So I tried a method to increase the upload size, but it didn’t work properly.
The usual way to set the upload size is to use the .htaccess file, but this didn’t work for me. It didn’t work after I switched to the OpenLiteSpeed web server, and after looking into the documentation, I found out that CyberPanel can easily set it.
So, let’s learn how to increase the upload size in WordPress and how to configure it if you have CyberPanel installed.
Table of Contents
Add .functions.php

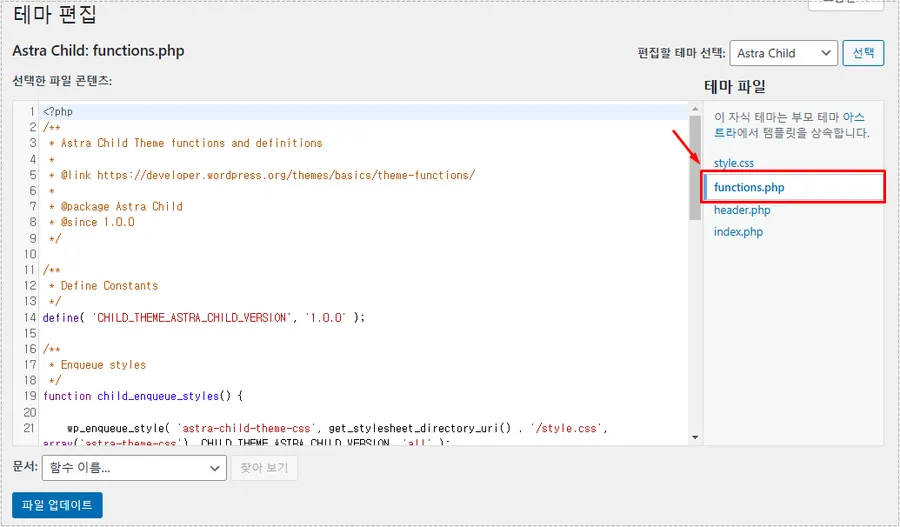
The easiest way is to edit the theme. Go to Appearance > Theme Editor, then select the functions.php file and add the code below.
@ini_set( ‘upload_max_size’ , ‘256M’ );

@ini_set( ‘post_max_size’, ‘256M’);

@ini_set( ‘max_execution_time’, ‘300’ );
The above code sets the maximum upload size to 256M and the maximum post size to 256M. If you clear the cache, you will see that the upload size has increased.
Add .htaccess

The next thing to do is to edit your .htaccess file. If you have an SEO plugin installed, you can easily access it. If you don’t have an SEO plugin, you can access it by logging into your server and editing the file.
php_value upload_max_filesize 256M

php_value post_max_size 256M

php_value max_execution_time 300

php_value max_input_time 300
If you add the above code to your .htaccess file, the size will increase. Please clear your cache and check if it works properly.
CyberPanel PHP Edit

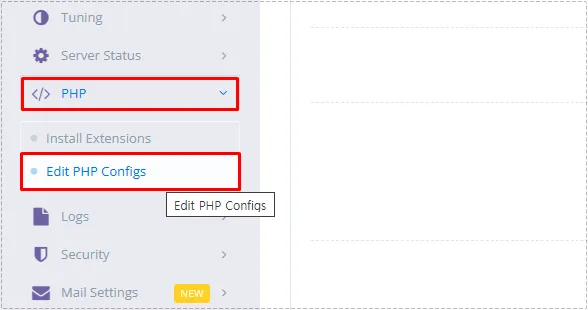
If you access https://serveripaddress:7080, you can enter CyberPanel. If you look at the left category, you will find PHP. From here, you can go to Edit PHP Configs.

When you go into edit PHP Configs, Select PHP will appear, where you can select the currently installed PHP version.

When you select the PHP version, the settings will appear as shown above. Here, you can set upload_max_filesize and post_max_size. Here, you need to set post_max_size higher.
Once you have completed the settings, click Save Changes and then click the Restart PHP button to apply them. Try applying the settings in WordPress and if it doesn’t work, try setting the upload size through Cyberpanel settings.
▶ How to remove Let’s Encrypt SSL (certificate) on Ubuntu
▶ How to completely remove Varnish Cache from Ubuntu
▶ How to install the OpenLiteSpeed (OLS) web server on Lightsail


