NinjaFirewall is a free security plugin that many people use. By default, it is set to WordPress mode when you install it, but if you want more security, you may want to change to Full WAF mode.
However, you may encounter an error when switching to Full WAF mode. This is because certain conditions need to be met before it can be activated. I didn’t know how to set it up at first, and I wandered around for a while before I finally figured it out and applied it.
The reason I was lost was because I didn’t know how to set it up in the OpenLiteSpeed WebAdmin admin. For OpenLiteSpeed Web Server users like me, let’s take a look at how to enable Full WAF mode.
Table of Contents
What is Full WAF mode?

While WordPress mode is sufficient to protect your site, I decided to enable Full WAF mode because I was experiencing spikes in CPU usage due to frequent external access to system files.
If the problem is caused by the server’s own processes, you can stop those processes to resolve the CPU spikes, but CPU problems caused by incoming connections from outside cannot be resolved except by increasing security.
To resolve the CPU spikes, we moved to a different instance and enabled NinjaFirewall’s Full WAF mode. We also applied a CDN to protect against DDoS attacks, blocked persistent bots via robots.txt, and blocked access from certain IPs via the .htaccess file.
Some people don’t like security plugins, but since there are often constant hacking attempts from the outside, it’s a good idea to apply a variety of methods, including reverse proxies, CDNs, and security plugins.
So let’s take a look at how Full WAF mode differs from WordPress mode.
Full WAF mode
- Run at the server level: NinjaFirewall watches all traffic at the server level, independent of WordPress, so even if other web applications besides WordPress are installed on the same server, you can protect them.
- Stronger security: All HTTP requests will pass through NinjaFirewall, allowing you to block malicious traffic before it reaches WordPress.
- Protect your entire site: Provides protection for all content on the server, including WordPress.
- Consume more resources: It will use a little more server resources because it inspects more traffic.
WordPress Mode
- WordPress-specific firewalls: It works like a WordPress plugin, protecting only WordPress’s internal traffic.
- Partial site protection: It only protects WordPress traffic, so if you have other web applications or content, your protection may be limited.
- Consumes fewer resources: Compared to Full mode, it uses fewer server resources and has less impact on performance.
If you want protection at the server level, Full WAF mode is for you, and if you want to use fewer server resources, you can use WordPress mode.
Enabling Full WAF mode
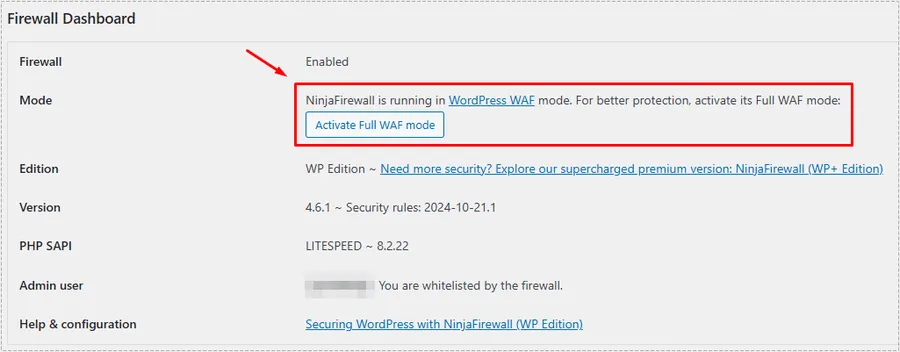
When you enter the dashboard after installing the NinjaFireWall plugin, it is set to WordPress WAF mode by default. If you want to change to Full WAF mode, you can click the ‘Activate Full WAF mode’ button located just below.
See how to set up OpenLiteSpeed
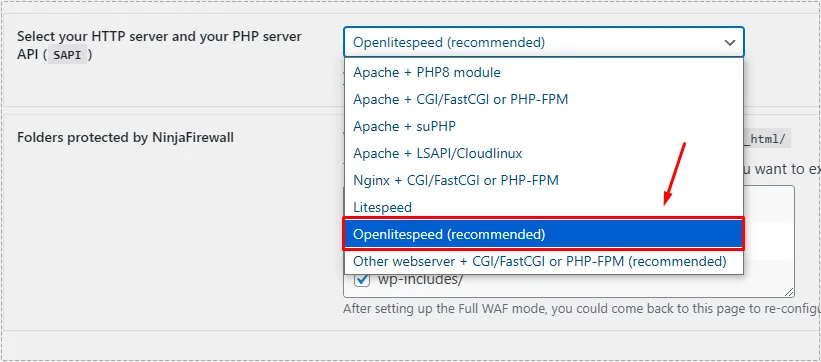
Click the ‘Activate Full WAF mode’ button and you will be prompted to select your HTTP server and PHP server APIs. If you’re using an OpenLiteSpeed webserver, you’ll be presented with the recommended settings by default, so just go with them.

In order to apply the following settings, you will need to follow the instructions below, which says to log in to the OpenLiteSpeed WebAdmin administration tool, add the following settings in php.ini Override under Virtual Host and restart the server.
Setting up OpenLiteSpeed WebAdmin
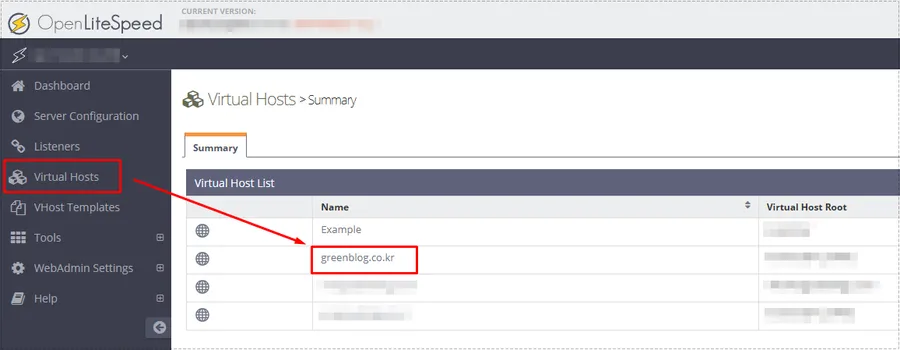
You can access the OpenLiteSpeed WebAdmin management tool by typing :7080 followed by your IP address or your own domain in your browser’s address bar. From there, select “Virtual Hosts” and click on the domain of your choice.
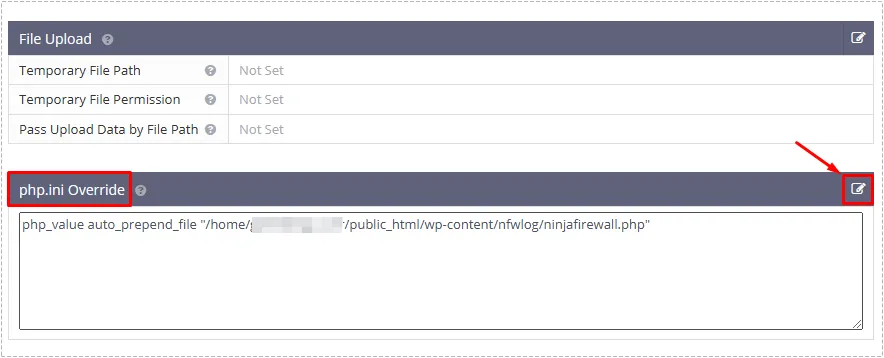
Once you’re on your own domain, you’ll see a menu at the top. From there, select ‘General’ and scroll down to the very bottom where you’ll find the ‘php.ini Override’ item. This is where you’ll need to add your settings, so click the ‘Edit’ button on the right.

Once you’ve added your settings to the Override entry in php.ini, you can restart your server by clicking on the IP address in the top left corner and then going through the options at the top of the screen.
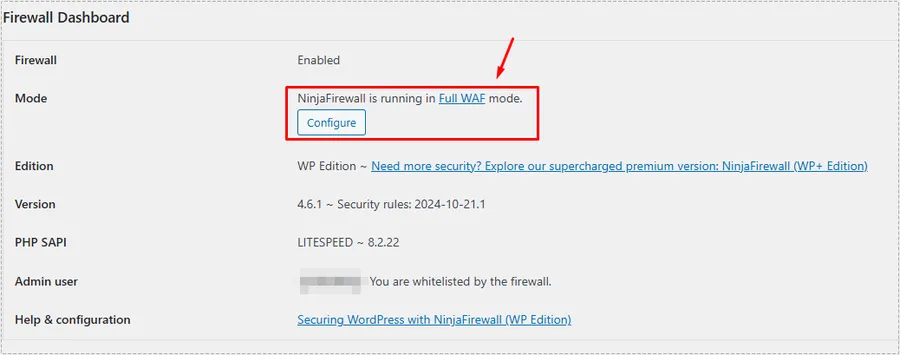
Once you’ve added the settings as described above, you should see Full WAF mode enabled in your NinjaFirewall dashboard, with no errors, as shown above.
If you’re using the NinjaFireWall Security plugin, the default WordPress mode is great, but if you’re looking for even more security, consider enabling Full WAF mode as described above. This will allow you to better protect your site.
▶ NinjaFirewall Sessions: How to Replace User Sessions
▶ How to resolve .user.ini warnings in NinjaFireWall plugins
▶ How to Resolve CORS Errors on the OpenLiteSpeed Web Server
