I recently switched to the NinjaFireWall security plugin and completed a FULL WAF setup, but the next day I noticed a .user.ini warning. This warning does not indicate a problem with the security plugin’s operation, but rather a prompt to increase security.
I looked for ways to resolve the security issue, and the documentation suggested that adding code to the .htaccess file would resolve the issue, but it still didn’t work.
Since I’m using the OpenLiteSpeed web server, I looked to see if I should apply a different method, and I was able to resolve the issue by adding a rule in the Webadmin administration tool. Although this may be a simple workaround, I’ll try to summarize it for those who are trying it for the first time.
Table of Contents
.user.ini warnings
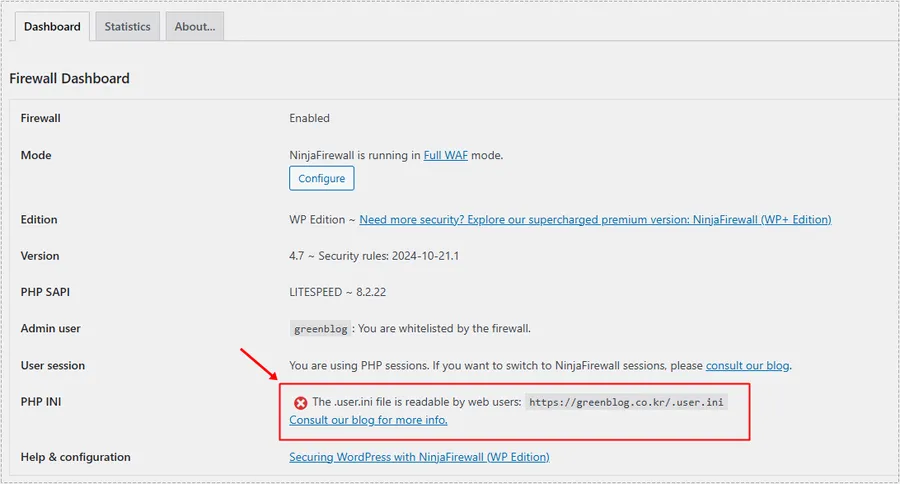
When you enter the NinjaFireWall plugin dashboard, you will see a warning message at the top about PHP INI. Interpreted literally, this message means that the user.ini file is readable by web users, which is a warning to block access to the file.
The official blog post below shows how to resolve this issue. I wasn’t able to resolve it with the methods described, but your system may be different, so let me summarize.
Apache HTTP server
<IfModule mod_rewrite.c>

RewriteEngine On

RewriteRule \.ini$ - [F,L]

</IfModule>
If you have an Apache server, you can add the above code to your .htaccess file.
Nginx HTTP server
server {

...

location ~ \.ini$ {

return 444;

}

...

}
If you are using an Nginx server, you can add the above code to your vhost configuration file.
After adding the above, restarting the server may resolve the issue. However, if you are using an OpenLiteSpeed web server, the above method will not work, so please follow the instructions below.
OpenLiteSpeed Webadmin Workaround
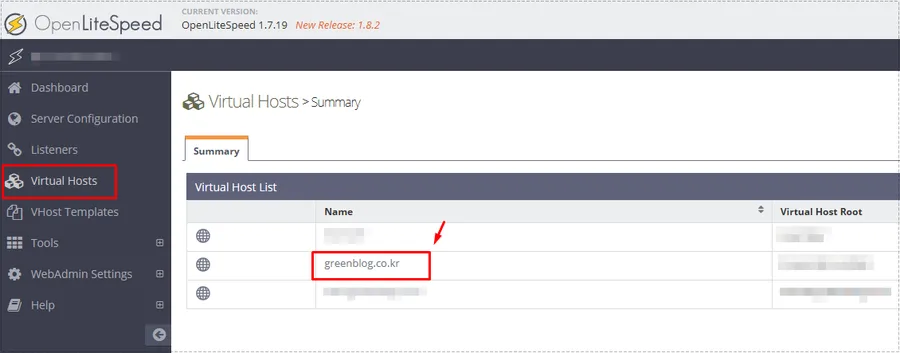
If you are using an OpenLiteSpeed web server, you can enter IP address:7080 in your browser’s address bar to enter the OpenLiteSpeed Webadmin management tool. From there, click Virtual Hosts in the left menu and select your primary domain.
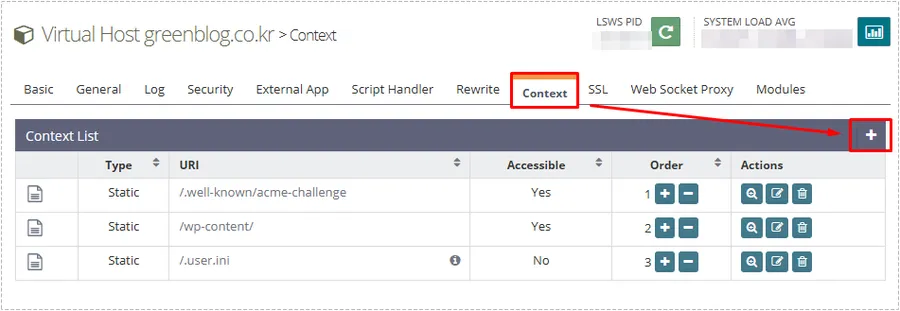
Once you’re in your main domain, you’ll see several menus at the top. From here, select ‘Context’ and then click the ‘+’ button on the right to create additional rules.
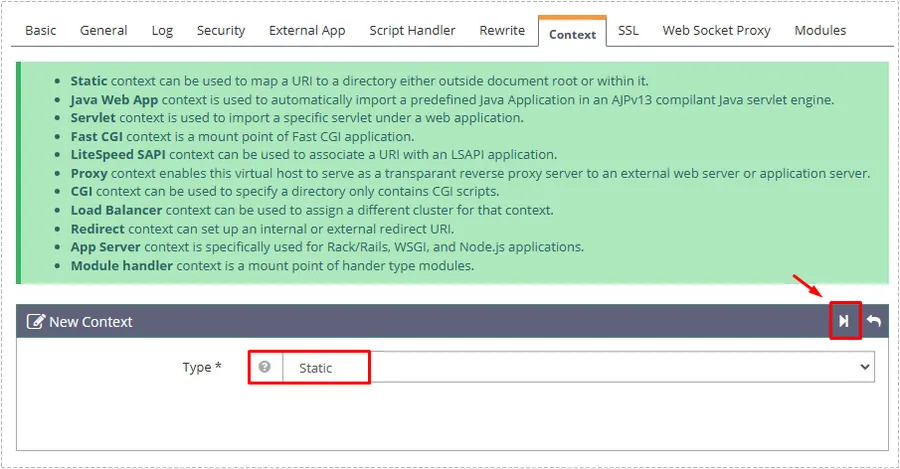
Click the + button to bring up the New Context screen. Here you can select the Type as Static, and then click the Next button on the right.
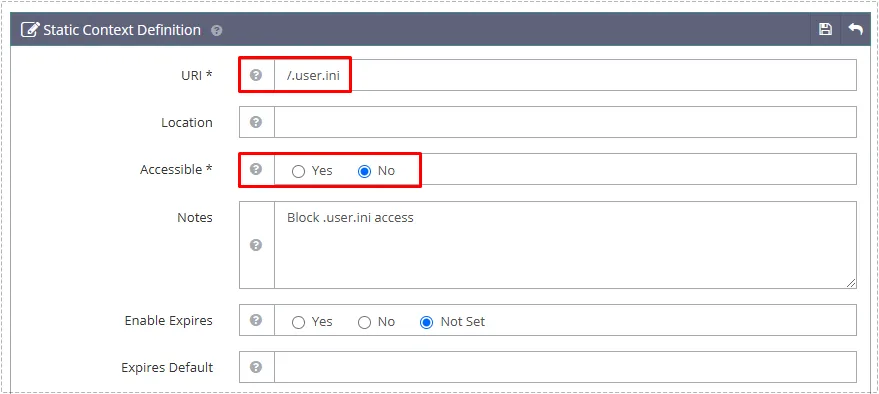
Click the Next button and the Static Context Definition screen will appear. Here you can set the following settings
- URI: /.user.ini
- Accessible: No
Once you’ve made the above settings, click the diskette-shaped Save button in the top right corner to finalize your setup.
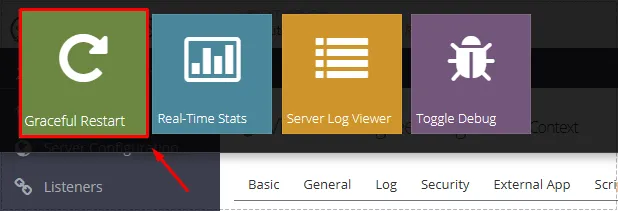
Once setup is complete, you can restart the server by clicking on the IP address in the upper left corner of the OpenLiteSpeed Webadmin administration tool.
Resolving .user.ini warnings looks like
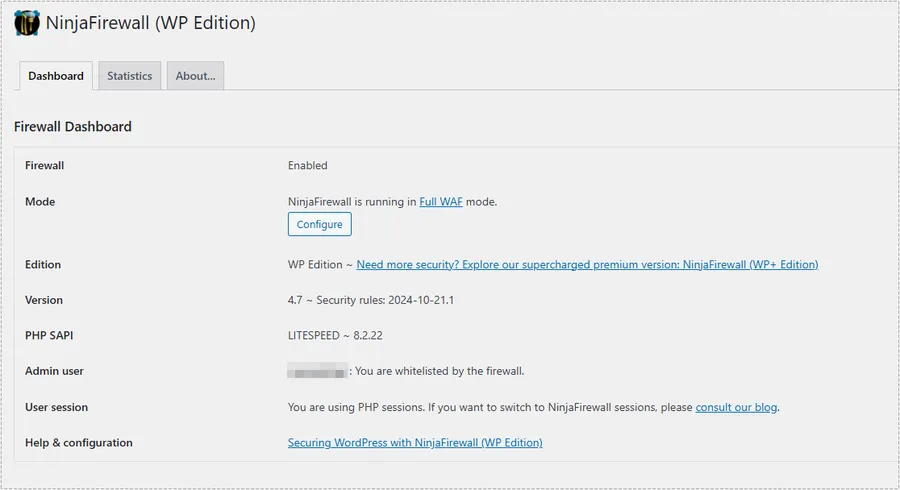
Now, if you go to the NinjaFireWall plugin dashboard, you should see that the warning message is gone. If you are using the OpenLiteSpeed web server, you can try the method above to resolve the issue.
▶ NinjaFirewall Sessions: How to Replace User Sessions
▶ Polylang Translation Plugin Fatal Error Resolution Review
▶ OpenLiteSpeed Reverse Proxy Setup Basic Configuration Guide
