Installing LiteSpeed Cache allows you to activate your own CDN, but due to the lack of information about speeds and costs in Asia, I decided to stick with the LightSail CDN I’ve been using.
However, if you don’t set up the LiteSpeed Cache plugin when you activate LightSail CDN, it won’t work properly. I’ve experienced this firsthand and found that it breaks images and CSS, so I searched for documentation on how to set it up.
After searching for a workaround, I found that setting up a custom domain for LiteSpeed Cache worked fine. It’s not hard to do, but if you’re new to CDN setup and where to add a custom domain, you might be confused like I was.
So I’m going to walk you through how to set up the LightSail CDN and the setup process in LiteSpeed Cache.
Table of Contents
How to set up LightSail CDN
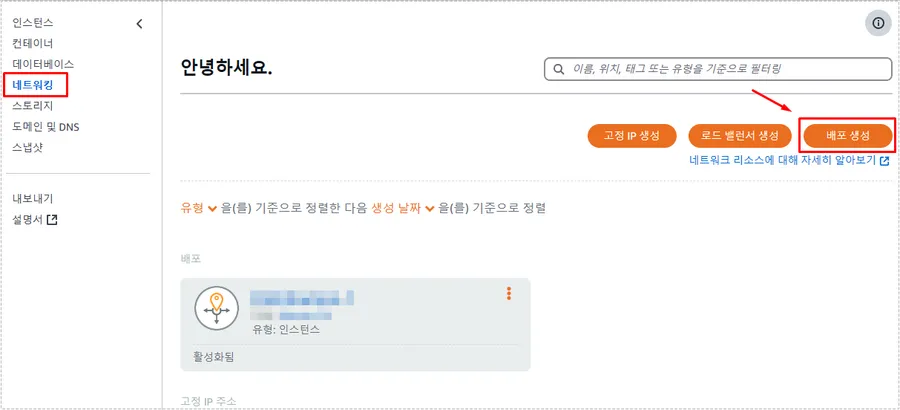
Enabling the LightSail CDN is simpler than you might think. While you used to have to do a lot of the setup yourself, today you can easily activate your CDN by creating a deployment and following the steps in the sequence, which will complete most of the setup for you.
However, even with everything set up for you, you still need to do things like domain assignment and certificates, so we’ll cover those.
Assigning domains
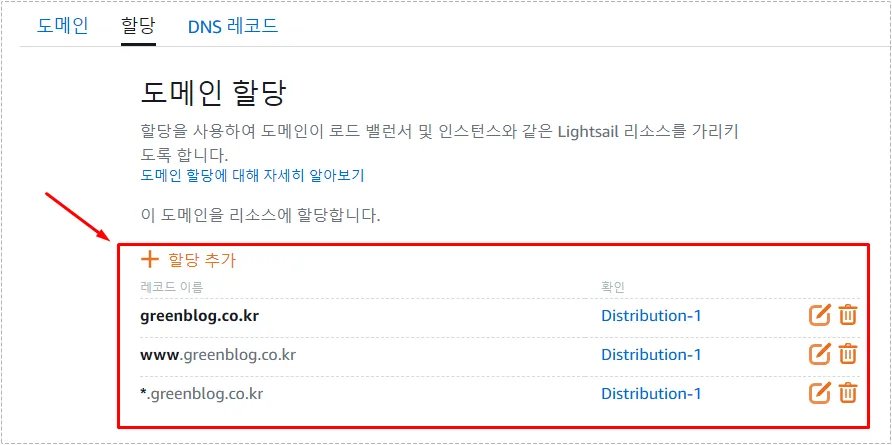
If you followed the deployment creation steps in order, Lightsail CDN should have been enabled. The next step is to apply the CDN to your site through domain assignments. If you don’t assign a domain, it won’t be applied to your site even if the CDN is enabled.
You can add a domain assignment by navigating to Domains and DNS in the left menu and then to Assignments. From there, you can apply the CDN to your domain as shown above.
Generate a certificate
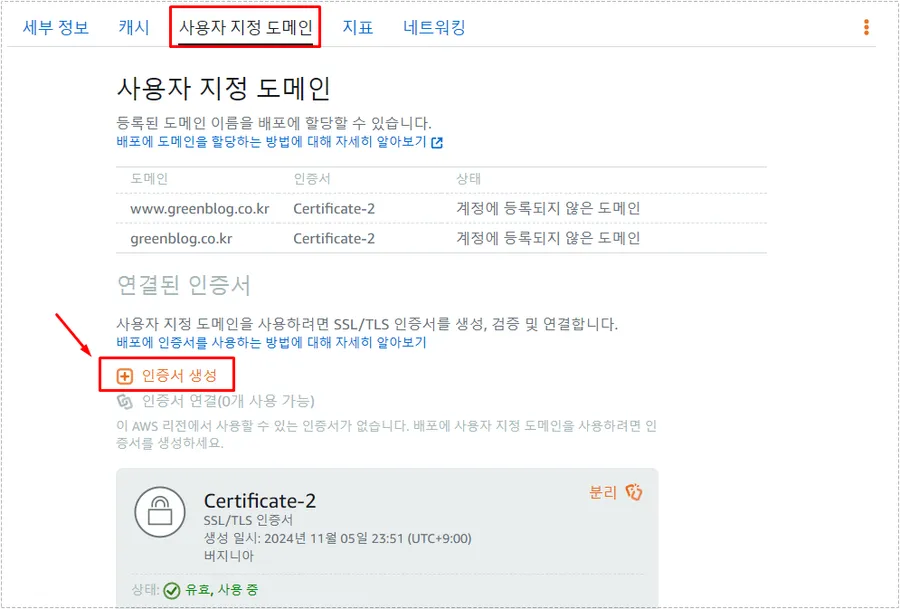
Even if you’re already using a certificate, you might not be able to access your site if you don’t generate a certificate. Registering an existing certificate is also a complicated process, so it’s more convenient to generate a new certificate to connect.
Select “Networking” from the left menu, then click “Deployment.” Then, under “Custom Domains,” hit the “Generate Certificate” button. You can then add the domains you want to use (e.g., primary domain, www.domain) and click the ‘Generate’ button.
The generation process will then proceed and the certificate will be applied to the domain you entered.
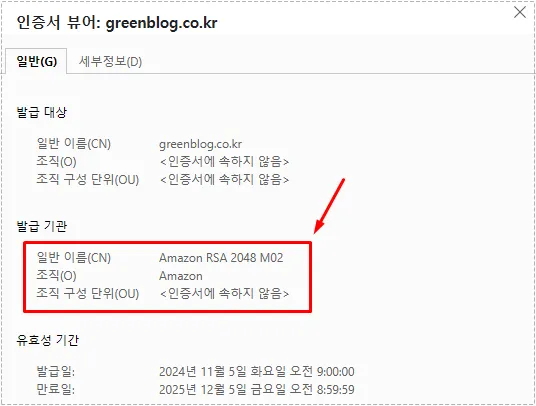
After you assign the domain and generate and apply the certificate, it will change to the Amazon certificate generated by the CDN instead of the Let’s Encrypt certificate you were using, as shown above.
Setting up the LiteSpeed Cache CDN
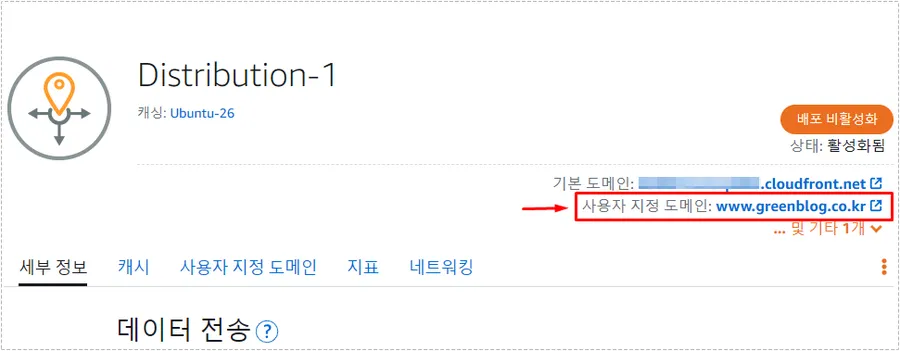
To set up the LiteSpeed Cache CDN, you need to resolve your custom domain on the LightSail CDN. You can find this information in the top right corner when you enter your CDN settings, as shown in the image above.
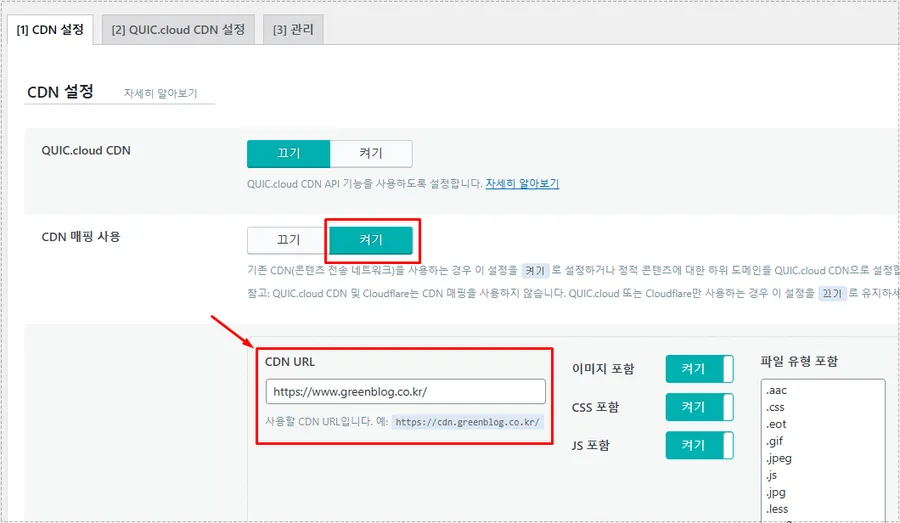
Once you’ve identified your CDN custom domain, go to your WordPress admin page and navigate to the ‘CDN’ section of the LiteSpeed Cache plugin. Then enable ‘Enable CDN mapping’, enter your custom domain in the CDN URL, and save your changes.
Once you’ve followed these steps, you’re all set. Assigning CDN certificates and domains during the setup process can be intimidating, but the instructions above should make it easier.
Because your domain is assigned to a CDN, disabling your CDN will make your site inaccessible, so if you don’t use a CDN or disable it temporarily, you’ll need to change your domain assignment to a static IP.
We recommend that you set up a CDN whenever possible, as it can speed up your website and protect it from external attacks.
▶ AMP for WP Plugin: How to Apply Automated Ads
▶ OpenLiteSpeed Reverse Proxy Setup Basic Configuration Guide
▶ How to apply the HTTP/3 protocol to the OpenLiteSpeed web server


