Users who install the OpenLiteSpeed web server and run WordPress using CyberPanel can easily configure a multisite setup or dual WordPress installations.
At first, when installing two WordPress on CyberPanel, a 404 error occurred. To solve this problem, I searched for a long time in foreign documents and finally found a solution.
The 404 error issue occurs because the subdomain is not recognized on the default port 80. The solution is to add it to Virtual Host Mappings in OpenLiteSpeed’s WeAdmin.
So, let’s see how to install two WordPress on CyberPanel and how to fix the 404 error.
Table of Contents
CyberPanel Access
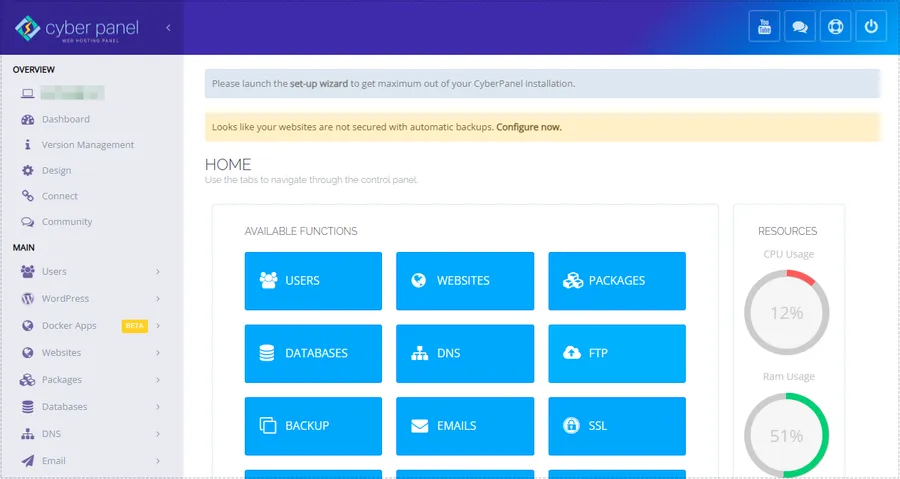
Accessing CyberPanel is very simple. Type http://server IP address:8090 into your web browser and the login screen will appear. Enter ‘admin’ as the username and enter the password you set.
sudo adminPass YOUR_NEW_PASSWORDIf you have forgotten your password, you can reset it by entering the above command in SSH. Just enter your new password in the ‘YOUR_NEW_PASSWORD’ field.
Create a website
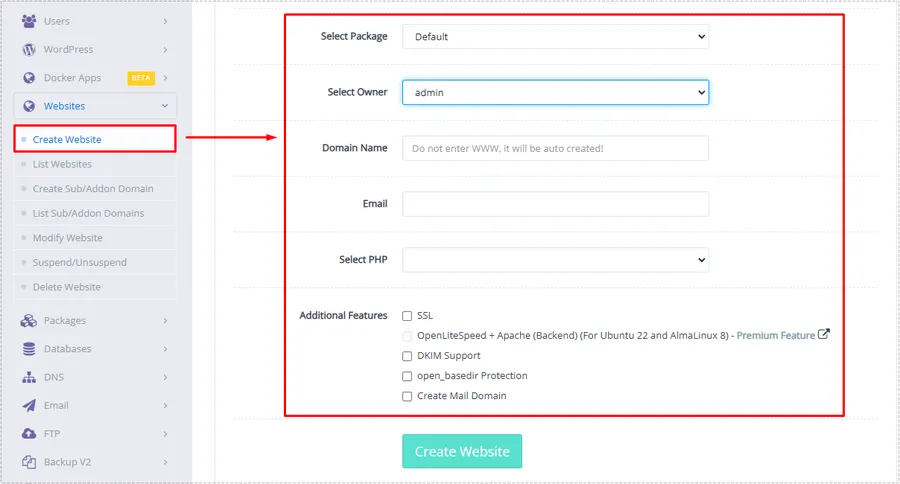
After logging into CyberPanel, go to Websites > Create Website on the left menu and proceed with the settings at the top. In ‘Select Package’, select the basic option, and in ‘Select Owner’, select ‘admin’.
Next, enter the subdomain you want to use (e.g. site.greenblog.co.kr), enter your email address, select the PHP version, and then click the ‘Create Website’ button at the bottom to create your website.
Here, you can change the PHP version later, but if you choose the version just below the latest version, there won’t be any major problems.
Installing WordPress + LSCache
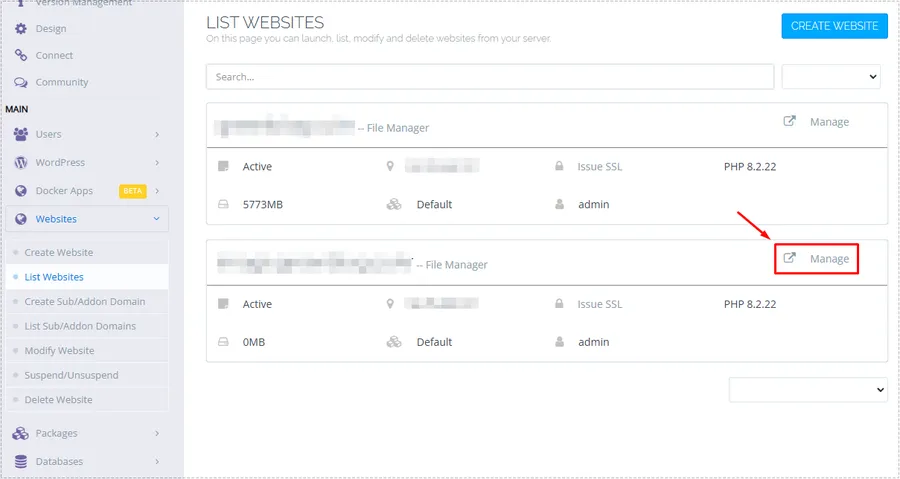
If you have created a website, you will now need to install WordPress. Go to ‘ Websites > List Websites ‘ to see a list of websites you have created. From there, click the ‘Manage’ button on the right.
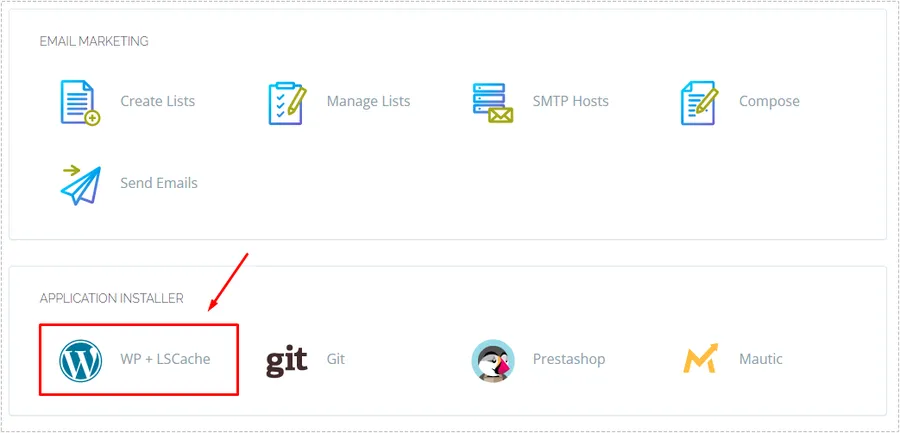
If you go to Manage, scroll to the bottom and you will see the WP+LSCache option. Click on it to proceed with the installation.
Setting up HTTPS redirect
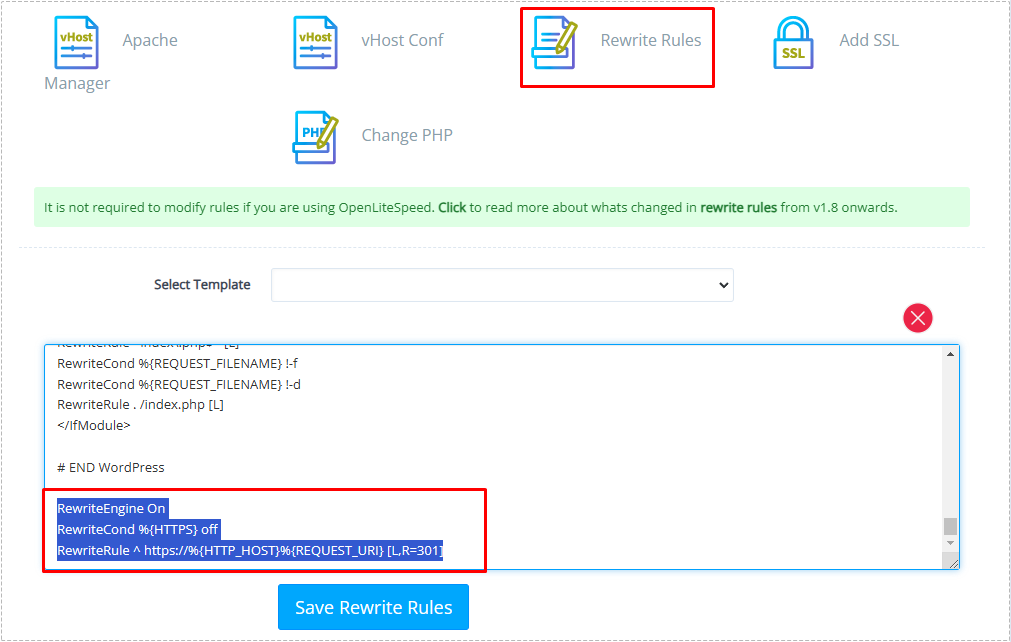
RewriteEngine On
RewriteCond %{HTTPS} off
RewriteRule ^ https://%{HTTP_HOST}%{REQUEST_URI} [L,R=301]
If you have installed WordPress, go to the Rewrite Rules option and add the redirect code above. This code sets it to automatically redirect to HTTPS when accessed via HTTP.
If a 404 error occurs
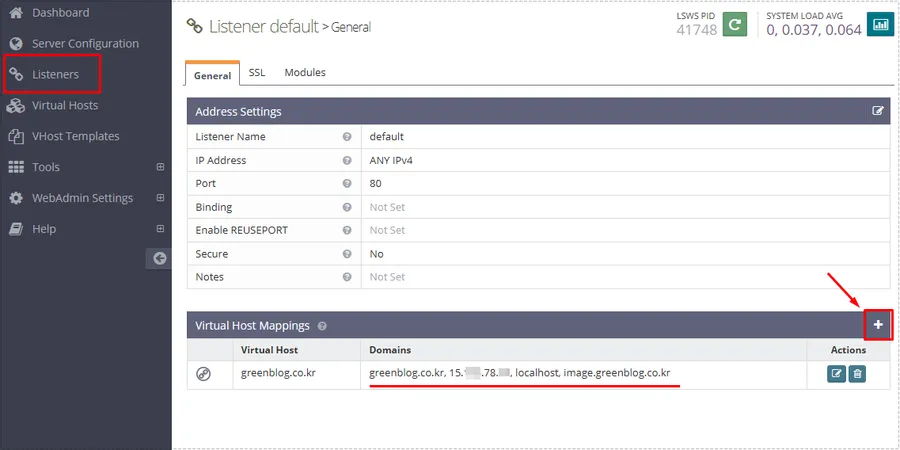
After completing all settings, you may encounter a 404 error when accessing the WordPress you created. In this case, log in to Webadmin and add a mapping.
After accessing http://server IP address:7080 , go to the ‘Listeners’ menu and select the 80 port setting. Then, in ‘Virtual Host Mappings’, click the ‘+’ button to add the domain address, server IP, localhost, and the domain address you created.
Then, click on the IP address in the top left corner and restart the server.
ex) greenblog.co.kr, 15.xx.xxx.xxx,localhost,image.greenblog.co.kr
Once the domain address is mapped, the 404 error will disappear. For those who use CyberPanel, it is not difficult to install two WordPresses, so please use it when creating other topics or additional pages.
▶ OpenLiteSpeed Reverse Proxy Setup Basic Configuration Guide
▶ How to Resolve CORS Errors on the OpenLiteSpeed Web Server
▶ How to enable dynamic scaling on the OpenLiteSpeed web server

